Repotting Houseplants into Hydroponics . . .
Plant Care After Repotting
Most plants do just fine after repotting. Some plants might need a little "Tender Loving Care" the first couple of weeks while they're getting acclimated to the Hydroponic System however.
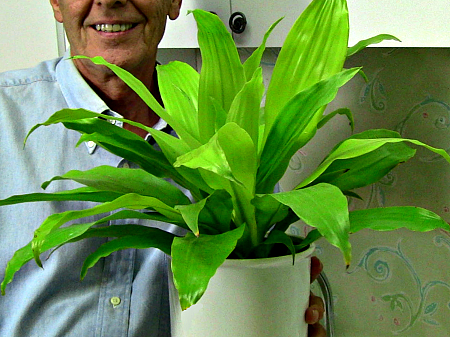 Dracaena Neon after transplanting
It's not unusual for a new transplant to droop or loose a few leaves in the beginning. Remove discolored leaves so the plant will focus all its energy on new growth. Discolored leaves will never turn green again and you'll have a better idea of your progress.
Don't panic! Some plants shed almost all of their leaves before growing new ones. New growth is always the best indicator on how your plant is doing. If you see new growth, don't worry about yellow leaves.
Don't get discouraged. Even if your plant struggles in the beginning, it will be healthier and happier after it adapts to hydroponics.
The 2 Important Things for New Transplants
1. Warm Temperatures at the Root Zone
Growing new roots is job #1 after repotting. Houseplants insist on temperatures of at least 68 degrees at the root zone for new roots to grow. If temperatures drop below 68 degrees root growth stops. Inactive roots deteriorate quickly, adding more problems for the new plant.
The best way to insure warm temperatures at the root zone is with a Heat Mat. Heat Mats warm the root zone gently and evenly without raising the air temperature at the leaves. See more at Coaxing New Plants to Convert
2. Lots of Humidity at the Leaves

Humidity also plays a vital role when repotting soil plants into hydroponics.
Try for humidity levels of 60% or more during transplanting.
Increasing Humidity for New Transplants
1) Lower temperatures at the leaves. Cool air holds moisture better than warm air. As long as the root zone stays warm, air temperature can go as low as 60 degrees.
2) Set your plant on a Humidity Tray. Moisture is added to the air as the water in the tray evaporates.
Grower Tip: Misting plants to increase humidity doesn't do much because the effects of misting are short-lived. Unless you mist your plant every 30 minutes, misting will not increase humidity.
Also, don't try to increase humidity levels by watering your plant more! Moisture in the air is completely different from moisture in the pot.
Watering New Transplants
Rule #1. Don't over water! Too much water and the roots will suffocate.
The key to watering new transplants is finding the right balance of air and water at the roots that will promote new growth.
In the beginning water sparingly. Then, as your transplant adapts to its new home, increase the water gradually.
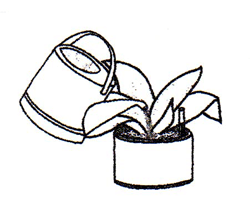 Pour KLN Solution (or plain water) over the pebbles until the little red indicator jumps up to 1/4-1/2 on gauge Pour KLN Solution (or plain water) over the pebbles until the little red indicator jumps up to 1/4-1/2 on gauge |
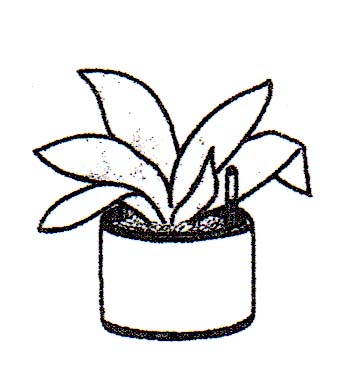 Wait 10-14 days Wait 10-14 days | |
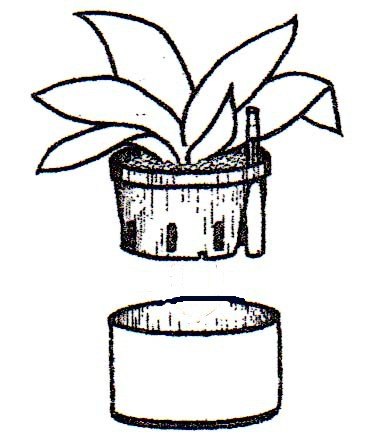 Using water gauge as a handle, lift inner pot and check bottom for dryness Using water gauge as a handle, lift inner pot and check bottom for dryness |
 If bottom is dry, rewater to 1/2 on gauge. If there's still water at the base, dump it out. Wait several days before rewatering with less water. If bottom is dry, rewater to 1/2 on gauge. If there's still water at the base, dump it out. Wait several days before rewatering with less water. |
Your plant should be using up all its water in 2 weeks. It's important to find the reservoir at the bottom of the pot empty before rewatering. This might require watering with less water (maybe only 1/4 on gauge).
Signs of Trouble
The first sign of trouble is wilting leaves.
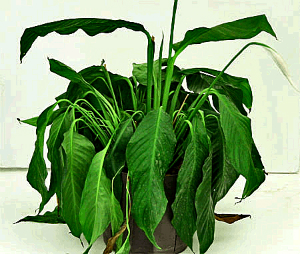 Wilting leaves on a Peace Lily
If your plant has droopy leaves, your first instinct is to water more because the plant looks thirsty.
Stop! That's exactly the wrong response!
Leaves droop when they don't have enough moisture to remain rigid. If your plant is wilting - and there's water in reservoir - the roots aren't sending moisture up to the leaves.
Stagnant roots need more air, not more water!
|
1. Take plant to sink and dump out any water remaining the reservoir. 2. Using water gauge as a handle hold plant and inner pot under sink and run clear water through the pebbles to leach the roots. 3. Start new watering program by simply running water (or KLN Rooting Solution) through the pebbles at the sink 1-2 times a week. No standing water at the base. |
Your plant should start looking better in a couple of weeks.
If it doesn't:
|
1. Lay the plant on its side and carefully remove it from the culture pot. Take a close look at the root system and cut away any rotting or decayed roots. (Don't panic - you're going to find some mushy roots!) 2. Rinse remaining active roots at sink (or use garden hose). Don't worry about how many roots are left - your plant will grow new ones. 3. Repot plant a little deeper in fresh, pebbles that have been soaking in KLN Rooting Solution. Save water from soaking pebbles for watering later. 4. Be stingy with the water- don't water plant immediately. Allow plant to sit in saturated pebbles for a couple of days. Then rewater by pouring water - saved from soaking pebbles - through the grow pot at the sink. 5. Return plant to outer pot with no standing water at the base. Repeat 1-2 times a week. |
Next, try moving your plant to a spot where the roots will be warmer. A Heating Mat is the best tool for this. Kitchen counters also work well. No heat vents or radiators though!!
Don't be too concerned about the condition of existing leaves. Many plants actually abandon their existing leaves and concentrate on growing new ones. So watch the growth tips - that's the future!
Plant Nutrition after Repotting
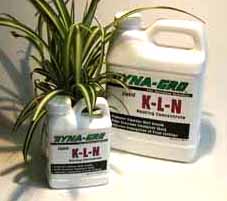
Resist the urge to give your new transplant a boost with an "extra dose" of fertilizer. New transplants can't absorb fertilizer and unused fertilizer will turn to salt - which can actually be harmful to new roots!
Instead of fertilizer, give your plant vitamins that encourage new root growth. We use and recommend KLN Rooting Concentrate. KLN is excellent for promoting new root growth and resisting disease - just what your new transplant needs! Use it in place of nutrients for the first 3-4 weeks.
Don't get discouraged if your first transplant fails. Hydroponic plants have many advantages over growing in soil and success is just around the corner!
Choosing Plants and Pots for Transplanting
Coaxing Stubborn Plants to Convert
